The DHT11 is a basic, ultra low-cost digital temperature and humidity sensor. It uses a capacitive humidity sensor and a thermistor to measure the surrounding air, and spits out a digital signal on the data pin (no analog input pins needed). Its fairly simple to use, but requires careful timing to grab data. The only real downside of this sensor is you can only get new data from it once every 2 seconds, so when using our library, sensor readings can be up to 2 seconds old.
Compared to the DHT22, this sensor is less precise, less accurate and works in a smaller range of temperature/humidity, but its smaller and less expensive.
Features:
- Ultra low cost
- 3 to 5V power and I/O
- 2.5mA max current use during conversion (while requesting data)
- Good for 20-80% humidity readings with 5% accuracy
- Good for 0-50°C temperature readings ±2°C accuracy
- No more than 1 Hz sampling rate (once every second)
- Body size 15.5mm x 12mm x 5.5mm
- 4 pins with 0.1" spacing
The sensor has the following 4 pins:
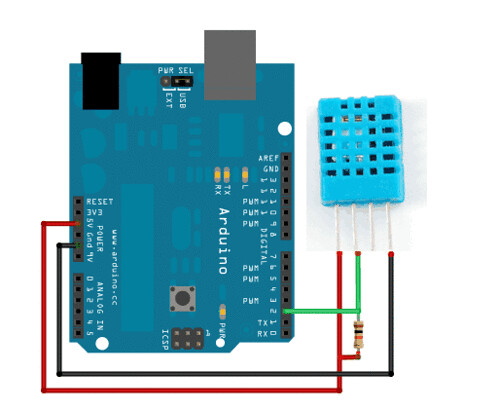
- VCC (3 to 5V power)
- Data out
- Not connected
- Ground
To test the sketch, we'll use an Arduino. You can use any micrcontroller that can do microsecond timing, but since its a little tricky to code it up, we suggest verifying the wiring and sensor work with an Arduino to start.
Begin by downloading the DHT library from Adafruit's github repository. To download, click the DOWNLOADS button in the top right corner. Rename the uncompressed folder DHT and make sure that it contains the dht.cpp file and others. Then drag the DHT folder into the arduinosketchfolder/libraries/ folder. You may have to create that libraries sub-folder if it doesn't exist. Restart the IDE
Now load up the Examples->DHT->DHTtester sketch
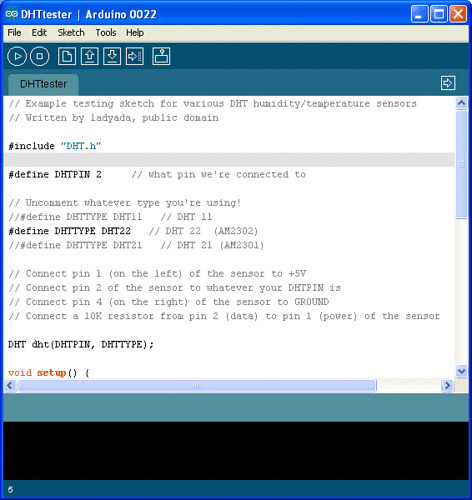
If you're using a DHT11 sensor, comment out the line that sets the type:
- //#define DHTTYPE DHT22 // DHT 22 (AM2302)
and uncomment the line that says:
- #define DHTTYPE DHT11 // DHT 11
This will make the data appear correctly for the correct sensor. Upload the sketch!
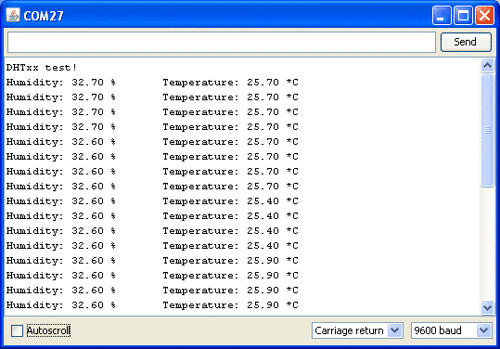
You should see the temperature and humidity data on the serial monitor. You can see changes by breathing onto the sensor (like you would to fog up a window) which should increase the humidity.
 Downloads:
- Arduino library and example code for DHT sensors
- DHT11 datasheet (in chinese, so see the DHT22 datasheet too!)
- DHT22 datasheet