Change Bluetooth Audio Amplifier Name or Audio Tone
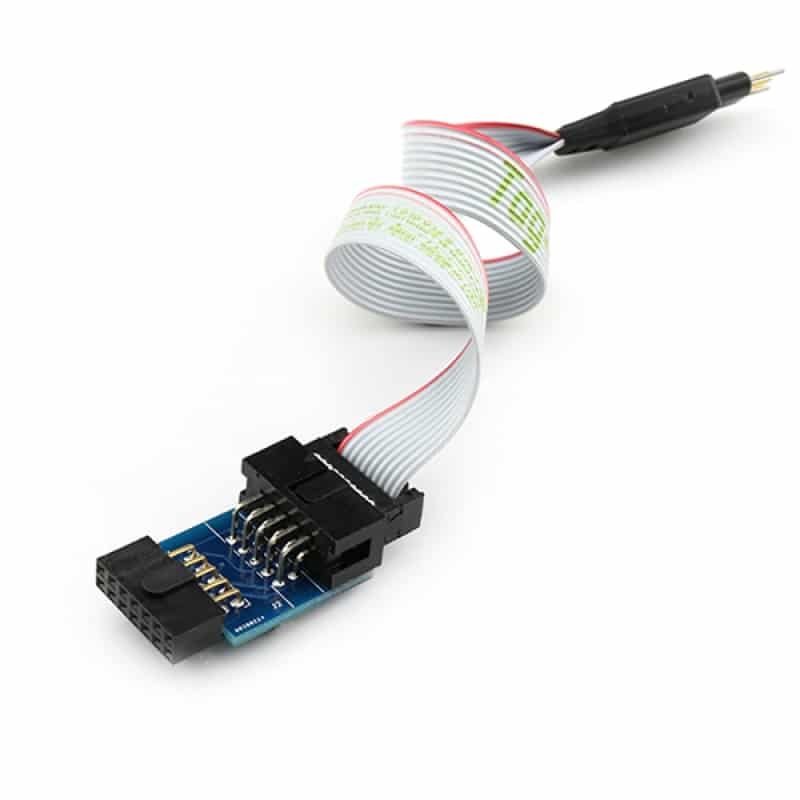
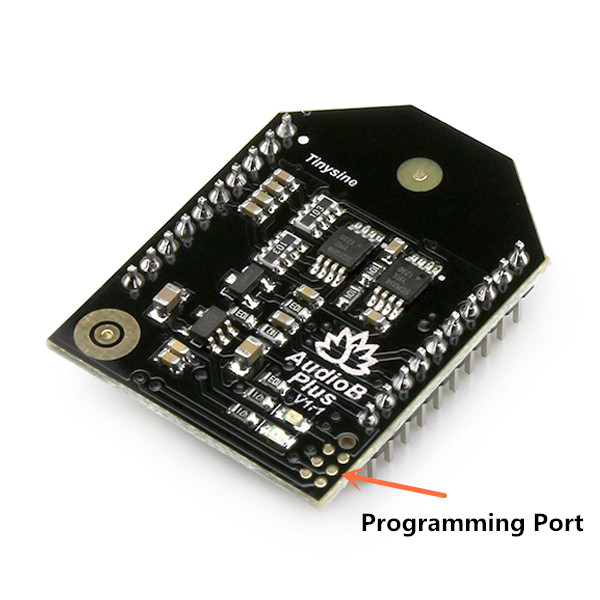
All of our Bluetooth audio amplifier boards and Bluetooth audio receiver boards use AudioB plus module as the core bluetooth receiver module. The default bluetooth name is “BT SPEAKER”. Maybe you want change it to a special name. We just updated the AudioB plus design and breakout the programming port. Now, you can change the BT name by yourself.
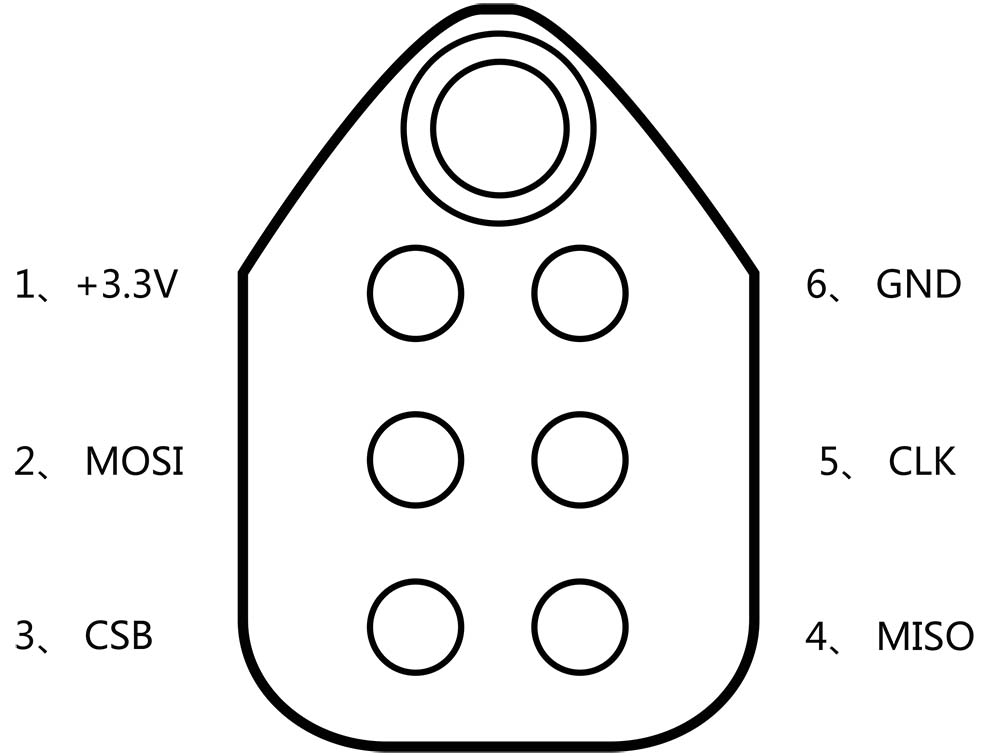
Hardware and Software required:
- Tag-Connect line Kit
- CSR USB-SPI programmer
- Download Bluesuite2.5.0 and install it
Step 1:
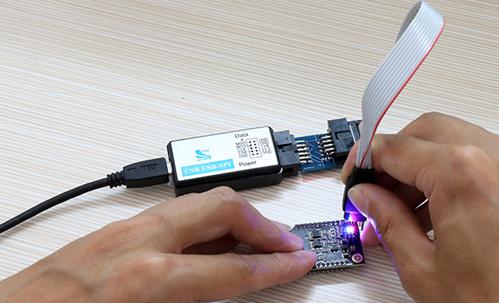
Connect the CSR USB-SPI programmer and Tag-Connect line with a AudioB Plus convert board, then connect CSR USB-SPI to your computer by a mini USB cable and windows will auto detect it and install the drivers.
Step 2:
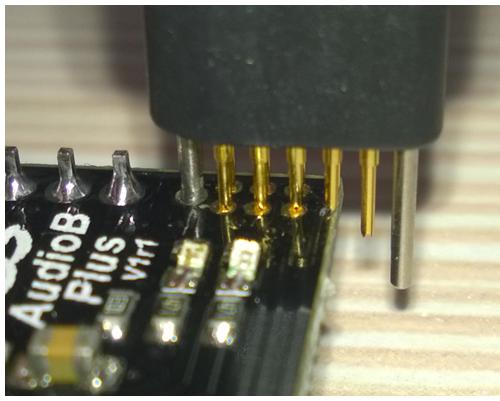
Connect TC2050-IDC-NL’s connector to AudioB plus programming port. You need to locate the single steel alignment pin of the connector into the single hole of the PCB footprint, then press down softly to engage the spring-pin contacts. Make sure the first 6 pins have a good contact with the corresponding pads. Then the blue led and red led will flashes alternately.
Step3:
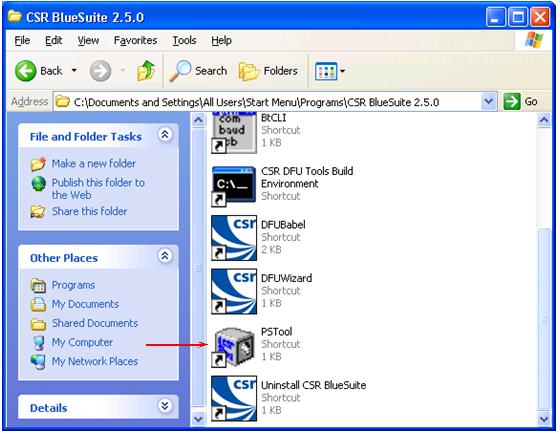
Make sure the connection is fine, then open PSTool in BlueSuite 2.5.0.
Step 4:
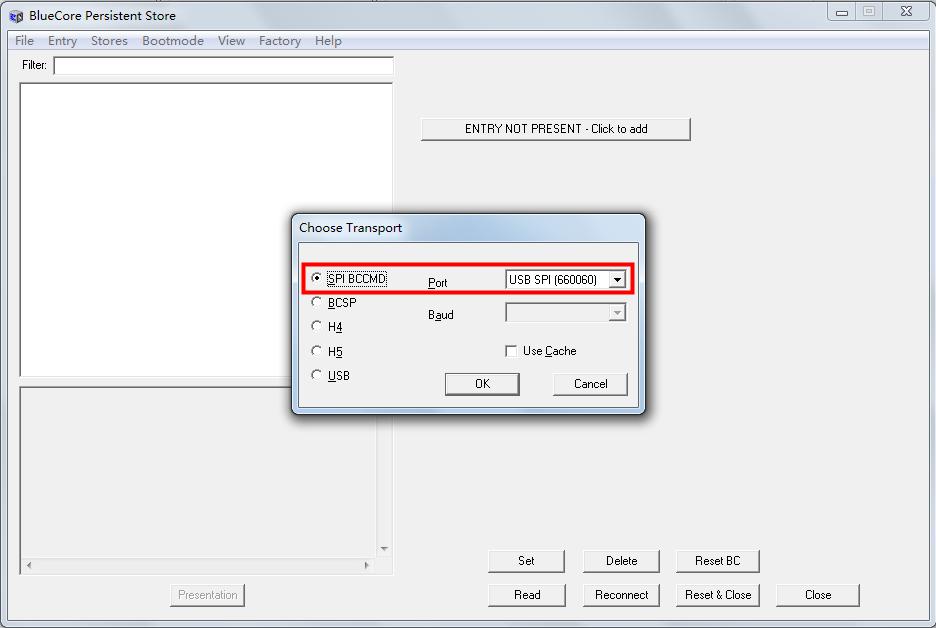
Choose “SPI BCCMD”, and if the connection is fine, the CSR USB-SPI device will show in “Port”, then click “OK”.
Step5:
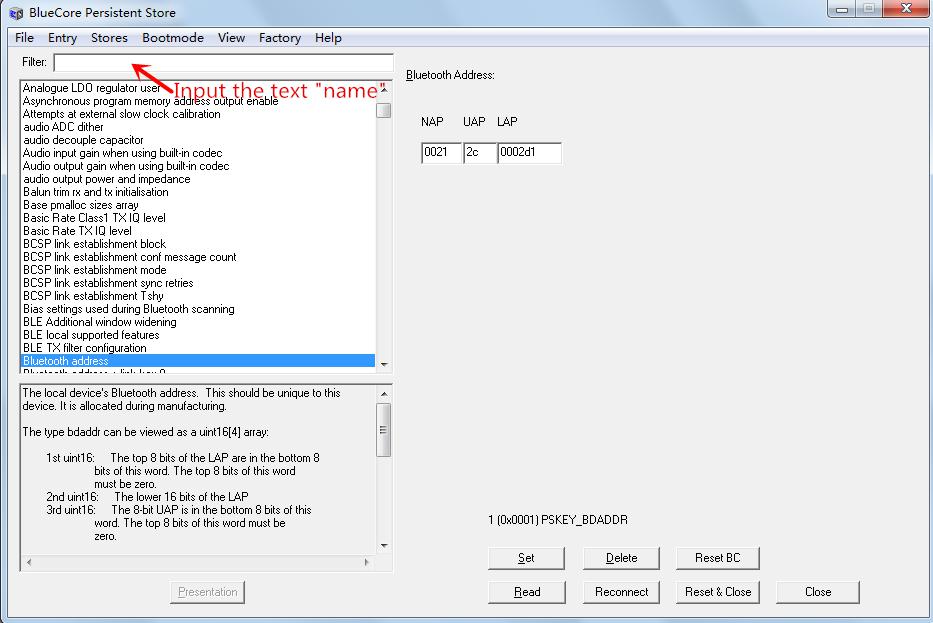
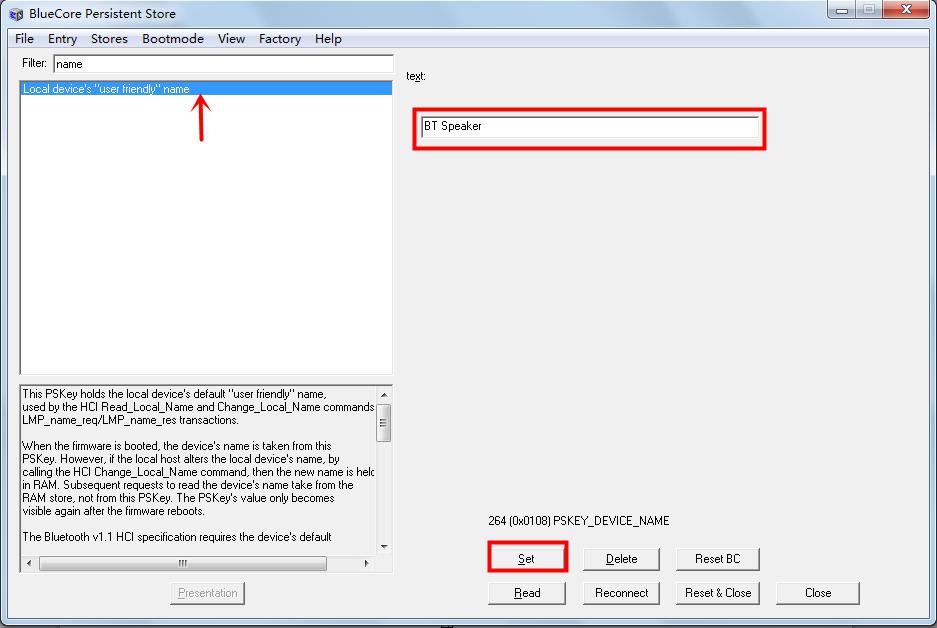
Next, Input “name” in “Filter”, then choose the option named “Local device’s ‘user friendly’ name”, the text box on the right will show the current name of Bluetooth module(default is “BT Speaker”), if you want to change it, just input the new name in this text box.
For example, here we input “TinySine Audio” then click “Set” to complete the change. Finally, close the program.
Note:
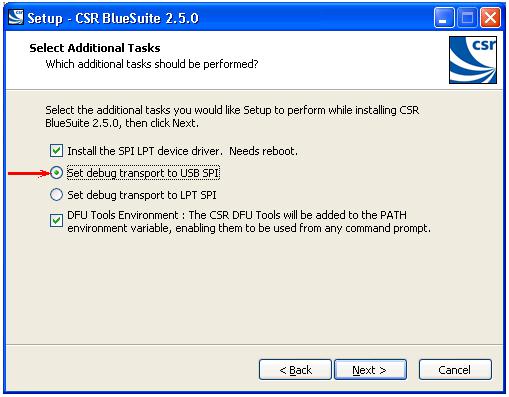
1. If you haven’t installed CSR BlueSuite 2.5.0 on your computer, please download it here and install it. During the process of installation, you need to check the option “set debug transport the USB SPI”.
2. You may need to install the driver for CSR USB-SPI programmer on your computer.
For 32 bit system:
C:\Program Files\CSR\BlueSuite 2.5.0\drivers\win32
For 64 bit system:
C:\Program Files\CSR\BlueSuite 2.5.0\drivers\win64
Remove The Audio Tone
Hardware and Software required:
- Tag-Connect line Kit
- CSR USB-SPI programmer
- Download Bluesuite2.5.0 and install it
- Download CSRXX_ROM_ConfigTool and install it
Step1:
Connect the CSR USB-SPI programmer and Tag-Connect line with a AudioB Plus convert board, then connect CSR USB-SPI to your computer by a mini USB cable and windows will auto detect it and install the drivers.
Step2:
Connect TC2050-IDC-NL’s connector to AudioB plus programming port. You need to locate the single steel alignment pin of the connector into the single hole of the PCB footprint, then press down softly to engage the spring-pin contacts. Make sure the first 6 pins have a good contact with the corresponding pads. Then the blue led and red led will flashes alternately.


Step3:
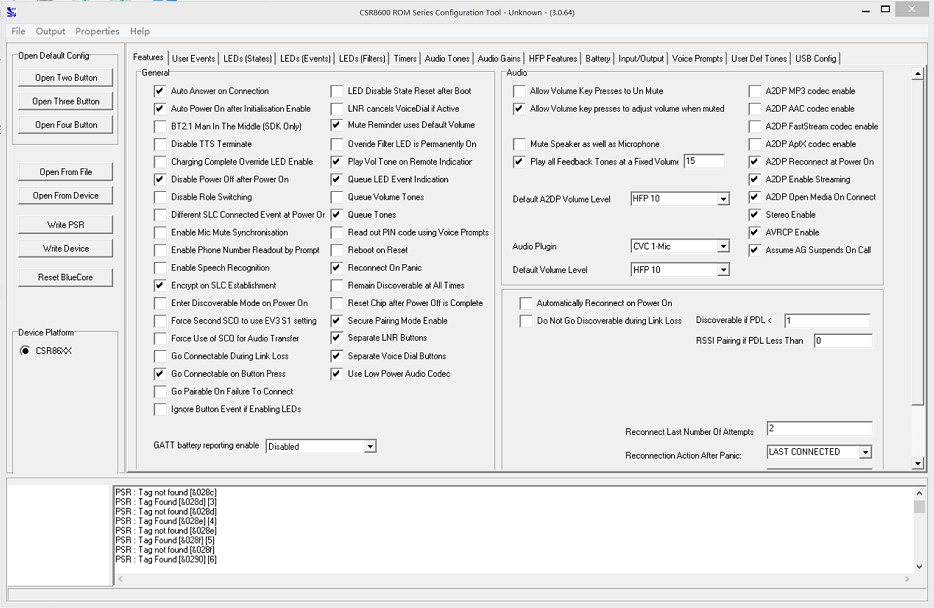
Make sure the connection is fine, then open Config Tool.
Step4:
Click “Open From Device” to read the chip information. Then goes into “Audio Tones” page after Read Device Successful. You will find 4 audio tones in the chip.
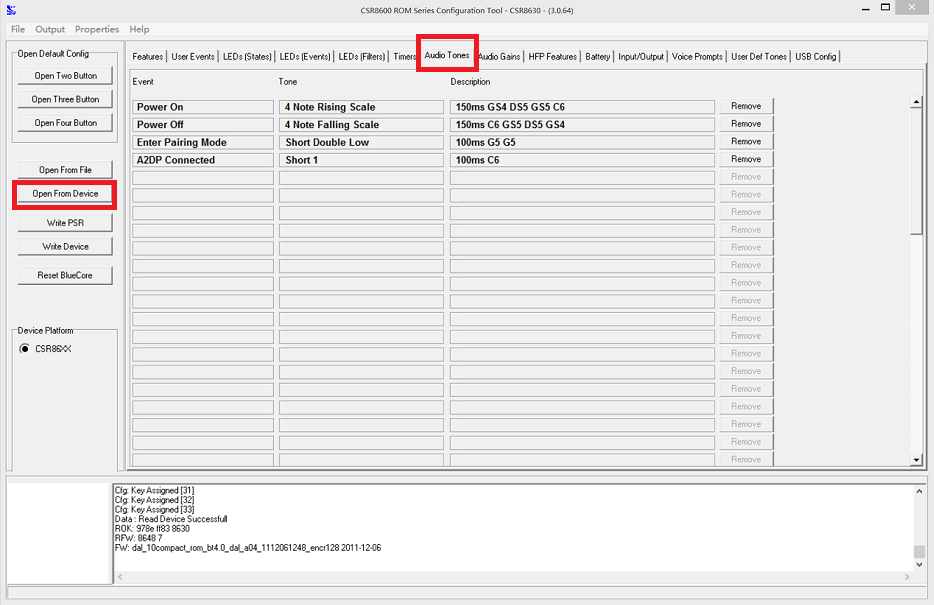
Step5:
Click “Remove” to delete 1-3 of them. You must keep at least one audio tone or will damage the chip. Then click “Write Device”.
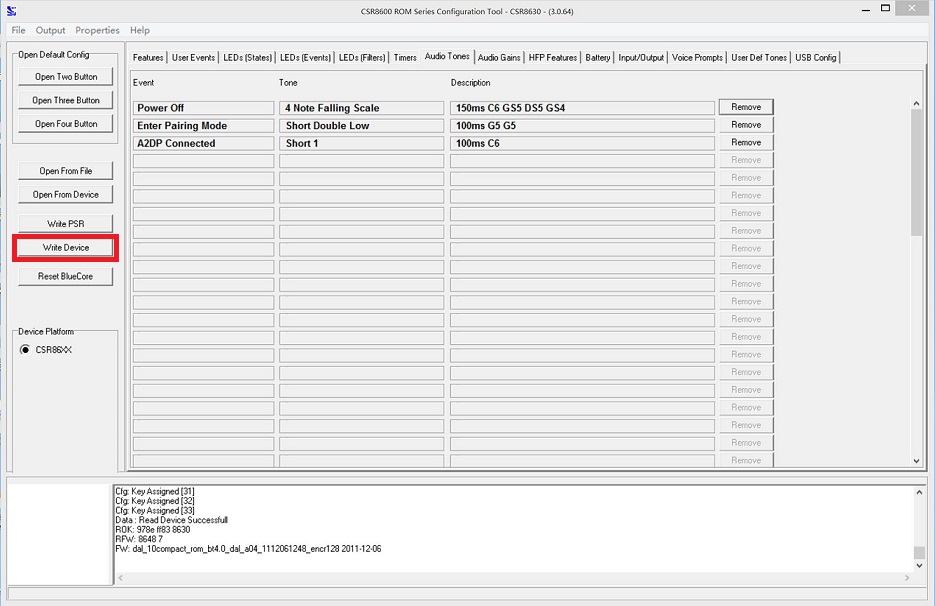
Step6:
You have removed the audio tone successfully. Close Config Tool program and remove the CSR USB-SPI programmer from your AudioB plus module.
Remove The Audio Tone (APTX)
Hardware and Software required:
- Tag-Connect line Kit
- CSR USB-SPI programmer
- Download Bluesuite2.5.0 and install it
- Download CSRA64xxx and CSRA63xxx Tools and install it
Step1:
Connect the CSR USB-SPI programmer and Tag-Connect line with an AudioB Plus convert board, then connect CSR USB-SPI to your computer by a mini USB cable and windows will auto detect it and install the drivers.
Step2:
Connect TC2050-IDC-NL’s connector to AudioB plus programming port. You need to locate the single steel alignment pin of the connector into the single hole of the PCB footprint, then press down softly to engage the spring-pin contacts. Make sure the first 6 pins have a good contact with the corresponding pads. Then the blue led and red led will flashes alternately.


Step3:
Make sure the connection is fine, then open CSRA64xxx Configuration Tool
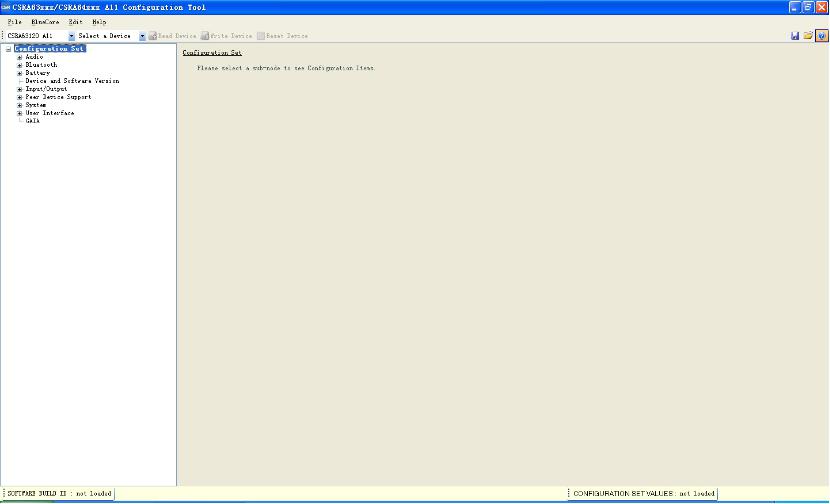
Step4:
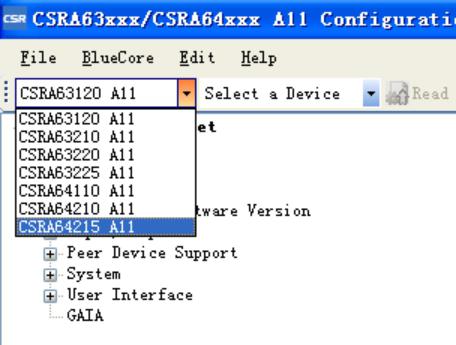
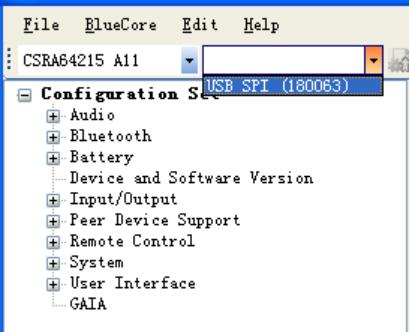
Please select the corresponding version of the chip in the left upper first drop-down menu, select USB SPI (180063) in the second dropdown menu, and then click “Read Device” to read chip configuration data from the AudioB plus circuit board .
Step5:
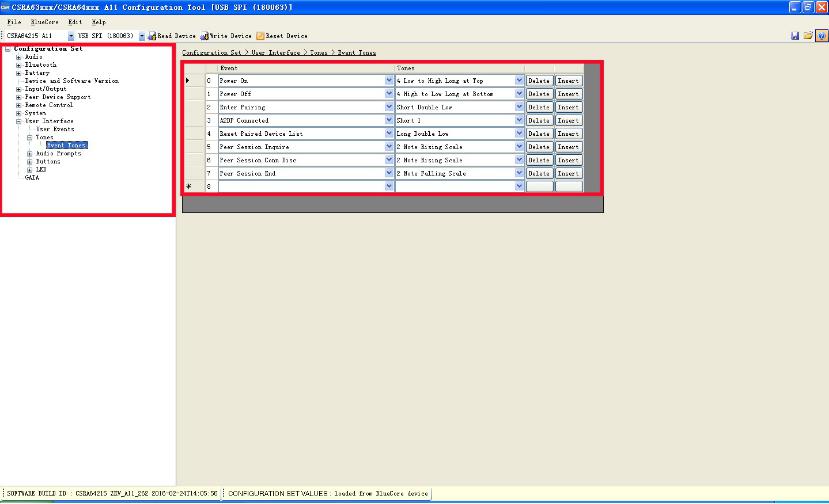
After reading the modue information, in the most left Set Configuration in order to start: User Interface → Tones→ Event Tonesr, You can find a total of eight kinds of audio tones.
Step6:
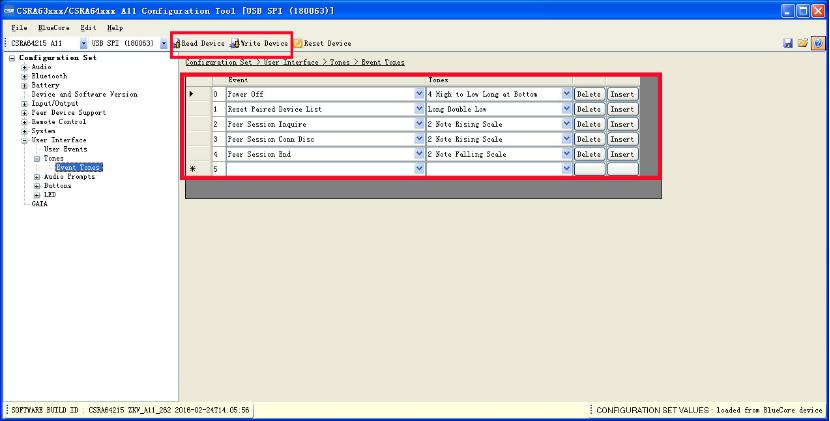
Click “Delect” to delete any of them. You must keep at least one audio tone or will damage the chip. Then click “Write Device”.
Step7:
You have removed the audio tone successful. Close Config Tool program and remove the CSR USB-SPI programmer from your AudioB plus module.


