Make Arduino on breadboard using FTDI breakout board
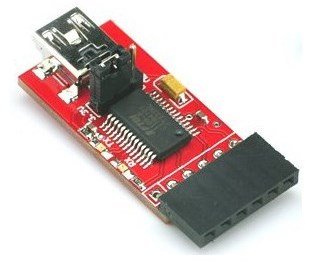
About FTDI FT232RL breakout board: This tutorial is about making Arduino on breadboard using a basic FTDI FT232RL based breakout board.The pinout of this breakout board matches the FTDI cable to work with official Arduino and cloned 5V Arduino boards. It can also be used for general serial applications. The major difference with this board is that it brings out the DTR pin as opposed to the RTS pin of the FTDI cable. The DTR pin allows an Arduino target to auto-reset when a new Sketch is downloaded. This is a really nice feature to have and allows a sketch to be downloaded without having to hit the reset button. This board will auto reset any Arduino board that has the reset pin brought out to a 6-pin connector.
![]()
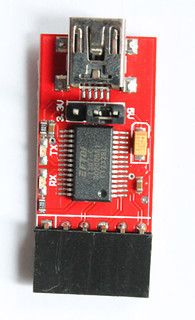
The pins labeled BLK and GRN correspond to the colored wires on the FTDI cable. The black wire on the FTDI cable is GND, green is CTS. Use these BLK and GRN pins to align the FTDI basic board with your Arduino target.
This board has TX and RX LEDs that make it a bit better to use over the FTDI cable. You can actually see serial traffic on the LEDs to verify if the board is working.
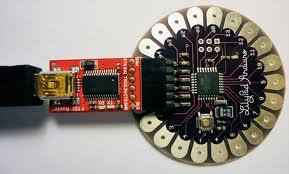
This board was designed to decrease the cost of Arduino development and increase ease of use (the auto-reset feature rocks!). Our Arduino Pro boards and LilyPads use this type of connector.
One of the nice features of this board is a jumper on the front of the board that allows the board to be configured to either 3.3V or 5V (both power output and IO level). You just need to move the jumper in order to use it for 3.3V or 5V experiments.
This breakboard has been made from the design files available on Sparkfun.com. You can get the same files from the following links:
Making Arduino on breadboard:
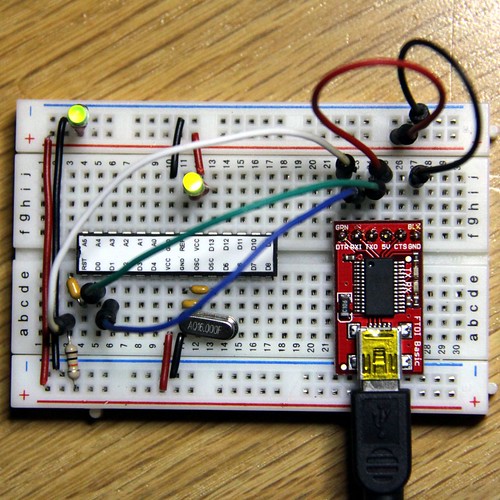
There are several tutorials available for making Arduino on breadboard using FT232RL breakout board. You may follow the following images to make one.
- DTR pin goes to one pin of 0.1uF capacitor and the other pin goes to reset pin(Pin 1) of ATmega328.
- RXD pin goes to TXD pin(Pin-3) of Arduino.
- TXD pin goes to RXD pin(Pin-2) of Arduino.
- VCC pin goes to pins 7, 20 and 21 of Arduino.
- CTS pin is connected to GND.
- GND pin goes to pin 8 of Arduino.
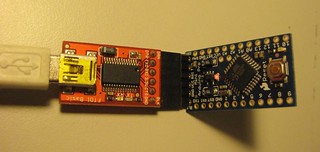
The breakout board can be used with Mini Arduino Pro:
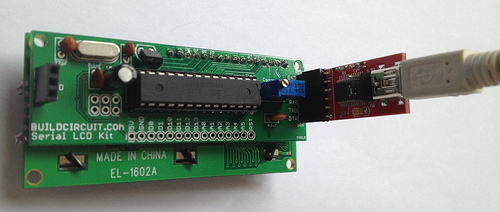
I have used this breakout board for programming serial LCD kit.



The instructions are totally wrong and don’t even match up with the picture. I see the led’s have no resistors. Is CTS going to ground or not?