Example 2- Using WTV020SD-16P music module with Arduino
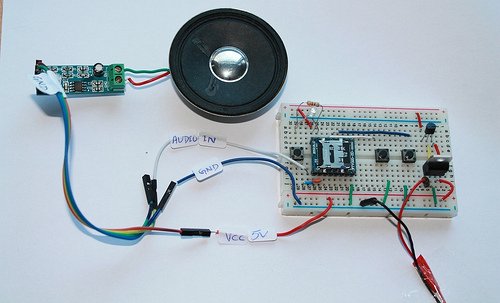
This article is about playing music files using WTV020SD-16P and Arduino. This experiment is suitable for amateurs and beginners. WTV020-SD module is a voice rewritable content type of mass storage voice module, pluggable maximum capacity of 1 GB SD card memory. It can load WAV format files and AD4 formats files.
WTV020-SD module voice chip has WTV020SD-20S master core, with MP3 control mode, the key one-to-one control mode (3 voice with the voice two), the power-loop control mode as well as the second-line serial control mode.
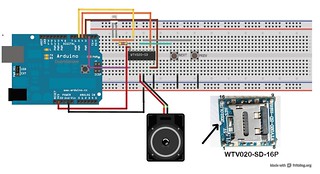
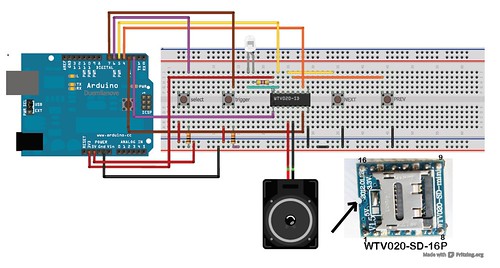
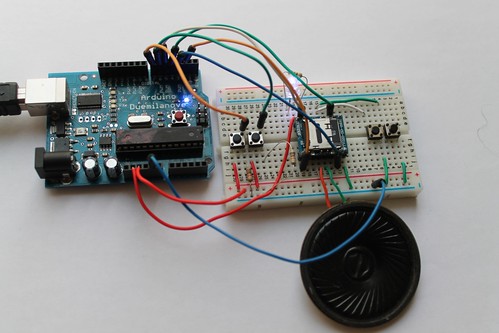
The following circuit layout shows a basic experiment of WTV020SD module using Arduino. This experiment is just a modification of another basic experiment. So, I recommend you to try that basic experiment first.
Connection for the first experiment:
In this experiment, I have connected NEXT, PREV, TRIGGER and SELECT switches. Actually, NEXT and PREV switces are optional because the songs stored on the microSD card can be controlled with Arduino also. Besides, you might also be surprised to know that Arduino is also optional if you just want to play the songs only. Check this tutorial that shows how to use this music module without Arduino. Also check this article that shows how to use an audio amplifier with the music module.
Simply go to the ‘Documents’ tab and download the sketch and upload to your Arduino. The link for the library is also available there. You can change the sketch to make the songs play the way you want.
How does it work?
When ‘SELECT SWITCH’ is pressed, song number 1 is selected and pressing the TRIGGER switch plays the selected song. When you press the SELECT button for the second time, song number 2 is selected and pressing the TRIGGER switch plays that song and it works the same way for song number 3.
I recommend you to try the sample files I have made.
DOWNLOAD AD4 FORMAT SAMPLE FILES- SET2-SAMPLES FILES 2 (NEW!!! uploaded on 15.1.2014)
If you want to know more about WTV020SD module, check the product manual.
Steps:
a. Copy AD4 format music files on to your 2GB micro SD card. I tested the project with 2GB microSD card only. Download AD4 Format Files (sample files). You can make your own AD4 format files, check this tutorial.
DOWNLOAD AD4 FORMAT SAMPLE FILES- SET2-SAMPLES FILES 2 (NEW!!! uploaded on 15.1.2014)
b. Connect 3.3V power to the music module. Remember that 5V may breakdown your microSD card.
c. Connect all the switches.
d. Upload the Arduino sketch. Get the sketch from the ‘Documents’ tab.
SEE MORE IMAGES OF THIS PROJECT
If this is your first experiment with WTV020SD-16P module, I strongly recommend you to read this article. The recommended article explains about the size of micro SD card and audio formats.
The project works with a 2GB microSD card and AD4 format music files. Click here to know how to convert a wave or mp3 format files to AD4 format.
c. Mp3 mode and audio amplifier.
d. Basic circuit with Arduino- example 1.
e. Basic circuit (trig and select) example 2.
f. How to convert mp3/wave format files to AD4 format.
WATCH THE OUTPUT
Related documents:
- Photos on FLICKR
- Datasheet of WTV020SD-16P
- AD4 Format Files– Download Samples (6 music files)
- About WTV020SD-16P evaluation kit
DOWNLOAD AD4 FORMAT SAMPLE FILES- SET2-SAMPLES FILES 2 (NEW!!! uploaded on 15.1.2014)
- Download Library (FROM ARDUINO.CC)
- LINK2 (DOWNLOAD Library)
Download SOMO tool for converting mp3 and wave files to AD4 format. - LINK TO GIST PAGE
Sketch:
You can buy all the components for this experiment on www.buildcircuit.com. The web store is owned and operated by buildcircuit.com. Buildcircuit.com is a reliable webstore for amateurs. It sells low cost components and offers fast shipping service.
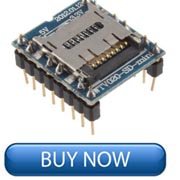
- WTV020SD-16P
- 3.3v regulator
- 5V regulator
- 2GB micro SD card
- Audio amplifier
- Speaker
- Tactile switch
- Wires
DO NOT USE 5V POWER SUPPLY FOR THE MODULE. 5V will burn both your MicroSD card and WTV020SD module. Please use only 3.3V power, either from Arduino or use 3.3V regulator chip.



Hello,
Thanks you very much for your tuto !
I have a question, how do you specifie to your wtv020sd16p that you use the “two line serial” mode ?
Because, when i make your breadboard and use your arduino code, only the “next”, “prev” button work (ad4 file are correctly played).
The select and trigger button not work (if i activate the arduino console mode, i see arduino receiving correctly the push button signal but no sound are played).
And when i send a negative power signal on the P05 pin, the volume is down (like the mp3 player mode explain). So i deduce the wtv020sd16p is not in “two line serial” mode.
So, how change the mode ?
No issue for this problem ?